Easy and Fool Proof Step by Step Tutorial for the Absolute Beginner
Making cup cakes is a great way to start to learn to bake. I would like to share with you an easy, fool-proof All-In-One recipe to make these gorgeous vanilla cupcakes, even for the absolute beginners! Good luck – I know you can do it! Take your time, there’s no rush. But most importantly have fun doing it.
PREPARING & TIDYING UP AS YOU GO ALONG
I remember when I first started baking, what a mess I made! I used to get so flustered and stressed. It wasn’t helped by my hubby coming home from work to find every surface in the kitchen covered in used baking equipment ! Then I got even more flustered as there wasn’t any room to make dinner! LOL
Oh, how I have learnt since then. So now, I’m a great believer in getting everything ready before you start to make a cake, and of course tidying up as I go along. This also prevents me from making silly mistakes. Baking should be fun and enjoyable not stressful.
A FEW THINGS TO DO BEFORE YOU GET BAKING
- Wash hands
- Start with a clean & tidy kitchen. Clean down your surface with antibacterial wipes or spray
- Have your tools/equipment out and ready
- Have your recipe and instructions in front of you
ALL-IN-ONE METHOD
The All-in-One method is just simply where all the ingredients are mixed together at the same time. This is the quickest and easiest method and still gives really good results.
This method is not ideal for light and airy cakes. E.g. Victoria Sandwich Sponges, Angel Cakes
EQUIPMENT NEEDED
- Strong paper cupcake cases
- 12-hole muffin tray
- Medium size bowl
- Electric hand whisk or food mixer
- Spatula
- 1 Tablepoon
- 1 Teaspoon
Tip
There are many different types of weighing scales. I suggest that you buy scales that you do not need to reset each time you lift off and put back the scale dish. I’ve made the mistake of weighing the bowl and ingredients together – it all went very wrong!
INGREDIENTS FOR 12 CUPCAKES
- 200g Caster Sugar
- 200g ‘unsalted baking spread i.e. Lurpack, Clover, utterly butterly)
- 200g Self-raising sieve the flour before adding into bowl
- 2 Free Range Eggs large (room temperature)
- teaspoon of vanilla bean paste or vanilla extract
- 2 tablespoons milk
Tip – It’s important to use room temperature eggs (not straight out from the fridge) when baking. Room temperature eggs disperse more easily and evenly in the batter. Since eggs place an important part in the structure, even distribution is important for texture. Room temperature eggs bind more easily to other ingredients.
INSTRUCTIONS
Step 1
- Ensure your oven rack is moved to the 2nd lowest position from the bottom
- Place your oven thermometer in the oven if you have one
- Heat oven to 180C, 160C fan assist oven
An oven thermometer is a really inexpensive piece of equipment, but worth its weight in gold.
All ovens cook at different temperatures and if you want great cakes, you need to know you’re baking at the right temperature.
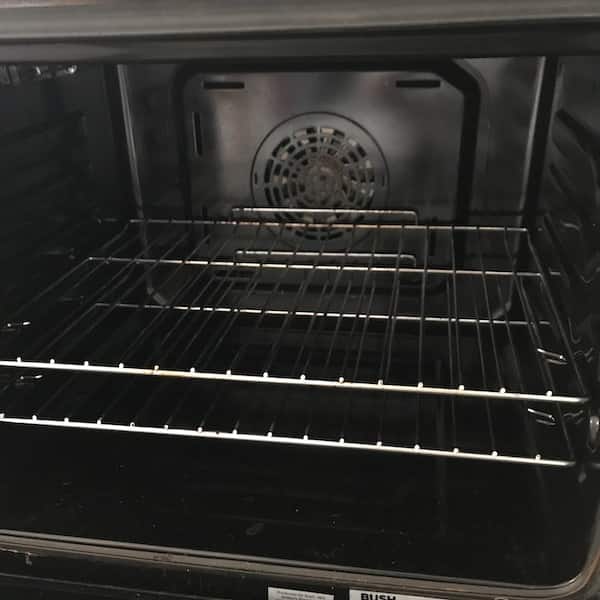
Step 1 - put the shelf 2nd from the bottom and add your oven thermometer
Step 2
Place a cupcake/muffin case in each hole of the muffin tin
Step 3
Tip – Always sieve the dry ingredients i.e., flour, raising agents, cocoa, icing sugar etc before adding it to your mixture. Sifting aerates the flour. This benefits the baking in many ways. It allows for a lighter and airy texture in a finished baked good. It also reduces any clumps of flour, raising agents in the batter.
Sieve your flour before you put it into your mixing bowl.
Put all ingredients together in your bowl
Use your hand whisk or stand whisk to mix the ingredients together for about 1 minute until the mixture is light and glossy. Don’t over-mix.
Step 4
- Divide the batter between the cases. You can do this in different ways, depending on your confidence levels and perfectionism:
- Eyeball it – so guess it
- Use a tablespoon full and fill each case
- Weigh the case on your scale and fill each case with the batter to weigh approx. 55/60 per case
- Don’t over fill the case. Maximum fill to ¾ full.
Tip – Please don’t slam down or tap the muffin tin on the worktop to get the mixture level as this knocks the air out of the mixture. We need the air!
Step 5
- The oven should be at correct temperature (if you remembered to set it before you started!)
- Place your cake pan/tin/tray on the 2nd shelf from the bottom of the oven. Ideally the cake pan/tin/tray should be in the middle of the oven.
- Set your timer. Either use the oven timer or a manual one. Bake for 25 minutes or until it’s cooked.
How to tell when the sponge is cooked
There are several things to look for when deciding if your cupcake have finished baking. Depending on the kind of cake you’re making, some of these tests will be more useful than others, so it’s important to learn the following for novices:
- You’re looking for a golden brown - the more sugar in the recipe the darker the brown it will look, so don’t worry it’s not burning!
- Open the oven and quickly gently press down on the centre of one of the cupcakes with 2 fingers to see if it springs back. If your fingers leave indents, your sponge isn’t quite done baking. Close the oven door and bake for at least 5 minutes more before checking it again. or
- It’s time to check with a skewer. Open the oven door. No need to get the cakes out.
- Insert the skewer into the middle of one of the cupcakes. If the skewer comes out clean, it’s done. If it comes out gummy or with crumbs clinging to it, they need another 5 mins in the oven. Reset your time for another 5 mins.
Tip This does take some practice. But if you use the above tell signs along with sticking to exact weight of ingredients, recipe and instructions then there’s less chance of your sponge going wrong.
Tip – Whatever you do DON’T open the door to have a sneak peek or test the cakes until the is near it’s baking end time and you notice the tell signs. Early peeking with cause your cakes to sink/collapse. Been there!
Step 6
- When cooked place the muffin tin on on a protective mat or on top of your hob
- Cool for about 15 mins and place the cupcakes on a cooling rack
Step 7 - Decorating the cupcakes
Basic Icing Topping
This is the simplest topping you can do
- Icing Sugar
- Water
- Gel/paste food colouring optional
Sieve the icing sugar into a bowl and gradually add a small amount of warm water until the icing becomes thick enough to coat the back of a spoon. Add a tiny drop of food colouring if you wish. If you need to add more water add just a tiny drop at a time - it’s easy to add too much and the icing will be too runny. Scoop a teaspoon of the mixture and let it drop gently onto your cupcake.
Why not add sprinkles????
Leave for an hour to set.
Buttercream frosting
Why not have a go at piping buttercream onto your cupcakes? See this vanilla buttercream recipe which is delicious AND easy to make.
CONCLUSION
The fantastic thing about cupcakes is that they are so versatile and fun to decorate in so many ways.
You can start with the absolute basic through to complicated designs – so the choice is yours and it’s endless!!
Store your cupcakes in a cardboard cake box rather than an airtight cake tin. No need to refrigerate.
Have fun!
Problems and Solutions
Why are my cupcake cases greasy underneath?
- It could be that the cases are on the thin side so try thicker ones and try and sprinkling a few dried rice grains in the bottom of the muffin pan before you put in the cases
Why do the cases peel away from the side of my cakes?
There are a few reasons:
- It may be the cupcake cases. If this happens frequently then try changing the brand of cases.
- It may be that your cupcakes are slightly under baked. Leave them in the oven for an extra 1-2 minutes
- It could be the way the cupcakes are stored. Cupcakes are best stored in cardboard cake boxes. This allows air circulation but it will keep them fresh. Whereas, if you store them in an air tight cake tin or plastic cake box with the lids on, this may cause condensation and it’s the moisture that will cause the case to peel away from the cakes.